HTML Canvas 裁剪
clip() 方法
clip() 方法将当前路径转换为当前的裁剪区域。
当一个区域被裁剪后,未来的绘制将只在裁剪区域内可见。
clip() 方法具有以下参数:
| 参数 | 描述 |
|---|---|
| fillrule | 一个点是在裁剪区域内部还是外部?可能的值:nonzero|evenodd |
| path | 用作裁剪区域的路径 |
我们来看一些例子
示例
首先,创建一个圆形裁剪区域。然后绘制两个矩形;只有位于裁剪区域内的部分才是可见的。
<script>
const canvas = document.getElementById("myCanvas");
const ctx = canvas.getContext("2d");
// 创建一个圆形裁剪区域
ctx.beginPath();
ctx.arc(100, 75, 70, 0, Math.PI * 2);
ctx.clip();
// 绘制两个矩形
ctx.fillStyle = "blue";
ctx.fillRect(0, 0, 300, 150);
ctx.fillStyle = "red";
ctx.fillRect(0, 0, 90, 90);
</script>
自己动手试一试 »
示例
首先,创建一个三角形裁剪区域。然后绘制两个矩形;只有位于裁剪区域内的部分才是可见的。
<script>
const canvas = document.getElementById("myCanvas");
const ctx = canvas.getContext("2d");
// 创建一个三角形裁剪区域
ctx.beginPath();
ctx.moveTo(100,20);
ctx.lineTo(180,100);
ctx.lineTo(20,100);
ctx.lineTo(100,20);
ctx.clip();
// 绘制两个矩形
ctx.fillStyle = "blue";
ctx.fillRect(0, 0, 300, 150);
ctx.fillStyle = "red";
ctx.fillRect(0, 0, 90, 90);
</script>
自己动手试一试 »
示例
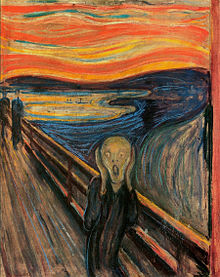
首先,创建一个圆形裁剪区域。然后将图像绘制到画布上;同样,只有位于裁剪区域内的部分才是可见的。
<script>
const canvas = document.getElementById("myCanvas");
const ctx = canvas.getContext("2d");
const image = document.getElementById("scream");
image.addEventListener("load", (e) => {
// 创建一个圆形裁剪区域
ctx.beginPath();
ctx.arc(110, 145, 75, 0, Math.PI * 2);
ctx.clip();
// 将图像绘制到画布上
ctx.drawImage(image, 0, 0);
});
</script>
自己动手试一试 »
示例
首先,我们将两个矩形保存到 Path2D() 对象中,这将是裁剪区域。"evenodd" 规则在裁剪矩形相交的地方创建了一个孔:如果我们使用默认的 "nonzero" 规则,就不会有孔。
<script>
const canvas = document.getElementById("myCanvas");
const ctx = canvas.getContext("2d");
// 创建裁剪路径(两个矩形)
let r = new Path2D();
r.rect(80,10, 45,130);
r.rect(40,50, 120,50);
ctx.clip(r, "evenodd");
// 绘制一个矩形
ctx.fillStyle = "red";
ctx.fillRect(0, 0, 300, 150);
</script>
自己动手试一试 »
示例
与上面的示例相同,但使用了 "nonzero" 规则(在裁剪矩形相交的地方不创建孔)。
<script>
const canvas = document.getElementById("myCanvas");
const ctx = canvas.getContext("2d");
// 创建裁剪路径(两个矩形)
let r = new Path2D();
r.rect(80,10, 45,130);
r.rect(40,50, 120,50);
ctx.clip(r, "nonzero");
// 绘制一个矩形
ctx.fillStyle = "red";
ctx.fillRect(0, 0, 300, 150);
</script>
自己动手试一试 »


